Showing posts with label Art Projects. Show all posts

Saturday, January 24, 2015

DIY Pattern Block Velcro Board

*Follow Me on Facebook, Pinterest, and Twitter*


So, it's no secret that I'm in love with dollar store cookie sheets. You can make all sorts of cool things, like this project, and this one (one of my most popular posts ever), and they're only a dollar meaning you can buy 2 or 4 or 17. They're also magnetic, which is great fun. (It's no surprise that magnets are one of my favorite things in the world, seeing as how Junior has one implanted in his head.)

Like magnets, Velcro is just fun. It makes things stick without making them sticky. I have issues with sticky things. Ick.

My kids love playing with blocks and making designs, and I knew there had to be a way to make blocks portable. We're in the car a lot, and Junior's been watching way too much Curious George on the DVD player. In an effort to get the theme song out of my head, and to keep him more actively engaged during car rides, I decided to take on the challenge of making blocks portable.

I ordered 15 feet of Velcro Stripsfrom Amazon (affiliate link), and also purchased some Velcro dots from an office supply store. I ended up using both the dots and strips...more on that below, but you really only need the strips.

Supplies:
We had a set of wooden pattern blocks from our math curriculum that I used to make this tray. We had 250 blocks in the set, and I probably only used 40 for this project, so we still have plenty left over for math.


First, measure out the length of the cookie sheet, and cut Velcro strips (you can use either side of the Velcro, but I did the pokier side for the board and the softer side for the blocks) to that length. Carefully attach the Velcro to the cookie sheet in one layer, making sure not to overlap the strips.

Once you've covered the cookie sheet with Velcro, get out the blocks you want to use. I used a variety of all the shapes. Probably about 40 in all. Take the opposite texture from the Velcro you used on the board (if you used the spikier side on the board, use the soft side for the blocks. If you used the soft side on the board, use the spikier side for the blocks.)

I used the strips on the board, and started using the dots on the blocks. But, I found they didn't stick as well, so I finished up using a little of the strips for each block. The strips seemed to stick better, but the Velcro itself didn't stick to the blocks as well because I had to pull so hard to get the blocks off. Tater said she preferred the dots better because they were easier to use. It's your preference.
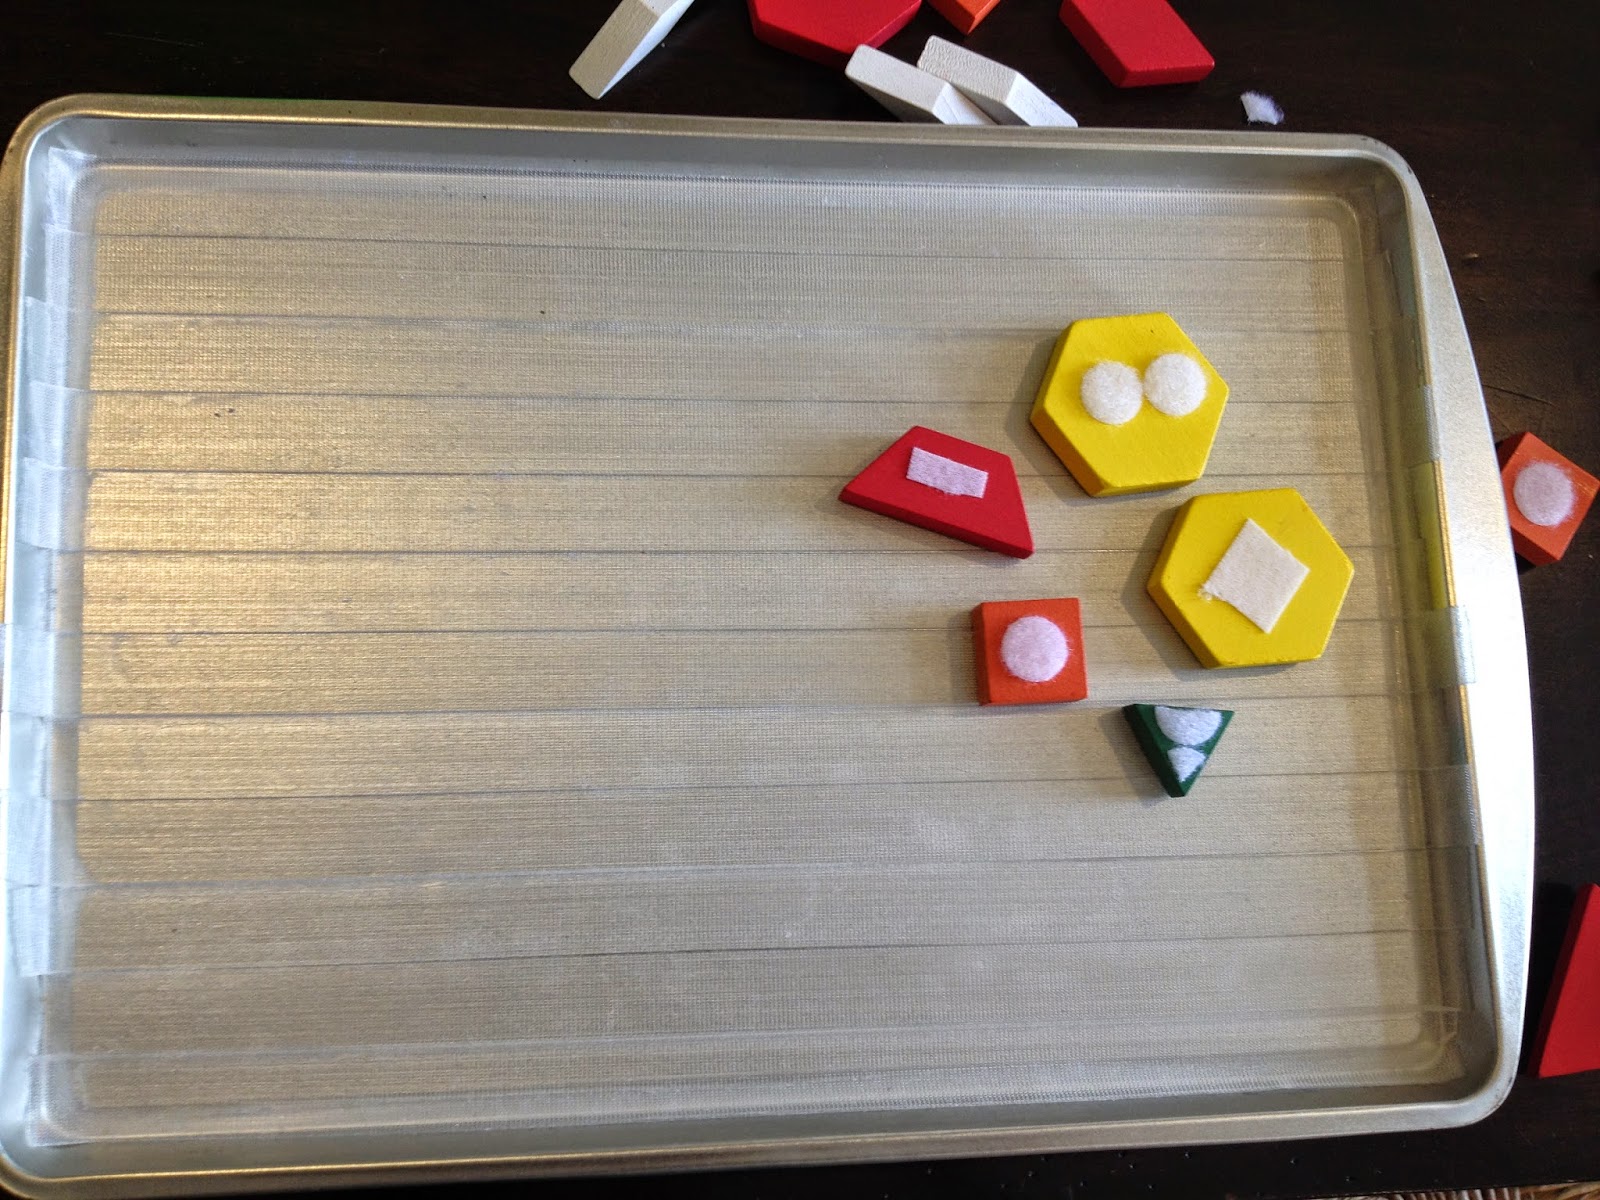

Once the Velcro is attached to the blocks, you're done! Store the blocks in a plastic bag, and make sure to keep the board clean, otherwise it won't stick as effectively.

I'm excited to add this to my Road Trip Must Haves for our next trip!

I'm linking up at Tater Tots and Jello and Flamingo Toes

Wednesday, January 14, 2015

DIY Valentine's Day Glitter Crayons

*Follow Me on Facebook, Twitter, and Pinterest*


Hi, my name is Sara, and I'm addicted to crayons.

Two years ago, my mother gifted me a 64-pack of Crayola crayons in my stocking. I still hoard them in my dresser, don't allow my children to touch them, and open them to smell their crayon-y goodness after a long day. Few things in this world are as pure and delightful as a box of brand new pointy crayons. Who wants to give me an "amen sister"?

Okay, so now that we've established that I have an unnatural love for school supplies, I'm going to show you how to make your own homemade heart shaped crayons. Because it's Valentine's Day. Who doesn't want heart shaped crayons for Valentine's Day?? And, they're super duper easy.

You only need two things. A heart shaped silicone mold and crayons. The heart shaped mold was at Michael's for $9.99, but I found a 50% off coupon, so it was only $4.99. The crayon bag is filled with all the broken/partially melted/restaurant freebie/Dollar Store crayons I hold onto for this very reason.


First thing you want to do is heat your oven to 325 degrees. Then, sort out your crayons. For this project, I used all shades of red, pink, purple, and white.


Next, you have to get those pesky little papers off. Either you can be smart and use a knife to slice the papers off, or you can be like me. It's possible I have purple crayon permanently lodged under my fingernail. It was a labor of love. How fitting.

Once all the pesky papers are off, snap your crayons into pieces and place inside the molds randomly.

Now comes the glitter. Glitter, glitter everywhere, on my floor and in my hair. True Story. Sprinkle your desired color (or colors) onto the broken crayon pieces. Tater chose the glitter, and she chose pink, purple, silver, white, and red.

Now, it's time to melt these babies! Stick them into the 325 degree oven (put the mold on a cookie sheet so it doesn't bend on the rack and give you uneven crayons), and allow to melt, about 15 minutes.

After about 15 minutes, they'll look like this...hot liquid.


Pull the cookie sheet with the mold on top out of the oven and let sit, undisturbed, until completely cool. This is crucial! Completely cooled I tell you...you can't rush love.

Or else you'll end up with a broken heart

So please, for the love of the crayons, don't release them from their heart shaped home until they're completely cooled. It should take about an hour.

Slip them out of the molds once cooled, and feel the love.


These are going to make a great Valentine's treat for Tater's friends. If she weren't homeschooled, I would totally make them for her class instead of giving candy. I'd tape them to pink card stock and write something witty like:

"I'm drawn to be your Valentine"
                                  
                                     OR
"I'm Cray-zy for you"
                                   
                                      OR
"You're Crayontastic"

So, that's it. That's how you make crayons...Cray-zy easy, right? (Sorry, couldn't resist.) Think of the possibilities for other holidays (I have a Christmas tree mold for Christmas, and a Star mold for 4th of July), and inexpensive party favors...you may become a crayon addict too. Not that that's a bad thing, though...


Saturday, November 8, 2014

5 DIY Travel Must Haves for Kids

For my 30th Birthday last week, we took a long weekend family road trip up to Northern California, to the town where my husband and I first lived after we got married. We wanted to take the kids to some of our favorite places up there. The drive was 8 hours each way, and while we did utilize the DVD player at times during the trip (Junior has been in a screaming phase lately, so the DVD was for my sanity and survival), I also brought along a lot of fun activities to keep the kids occupied. 

Travel Lap Tray

This is so easy and inexpensive. It makes for a great all-purpose travel tray. Definitely my top must-have for any road trip or plane ride. See the instructions here.


 Lego Patterns Travel Game (Free Printable)

My 6 year old has a lot of fun with this Lego pattern game, and it's easy to transport. Make sure you pack a few extra pieces in case they're dropped! Get the printable here.


 DIY Lego Travel Tray
We've brought this super easy Lego tray on every trip we've taken in the last year, and I can guarantee at least 45 minutes of quiet when my daughter is building. Find the simple instructions here.


 Felt Funny Faces
For some creative fun, follow this tutorial for making a Felt Funny Face kit. Working on their Travel Tray, let your child mix and match facial features to create their own funny faces. 


Imagination Connect the Dots
Purchase a sketch pad from the dollar store, and draw a bunch of dots on each page. Have your child connect the dots however they want, and have them tell you the story behind their "drawing". See some examples here.


What are your must-have travel activities? Join the conversation on Twitter and Facebook!

Pin This!


Monday, November 3, 2014

Post Roundup-October 2014

I can't believe it's November already. It seems like October just flew by! It was a busy month here. I turned 30, we took a family road trip, and Junior got a big boy bed! Here are all my posts from the month of October.

About Me

Special Needs

Kids Fun and Activities

 Homeschooling

Recipes
Book Reviews

 Come Visit Me on Facebook, Twitter, and Pinterest!

Tuesday, July 22, 2014

Kid's Craft...Felt Funny Faces

I love doing art projects with felt. It's cheap, colorful, and you can do just about anything with it. When Stinker was little, I made Felt Cookies for her to decorate, and she still pulls it out to play with on occasion. Since Junior has been learning the body parts in speech therapy, I thought it would be fun to make a felt face game for him to practice naming facial features.

You'll want to get a bunch of different colors of felt...each piece is only about $0.20, and different colors makes it more fun, I think.

Start by cutting a head shape out of a light colored piece of felt...I just free drew it, so it's a little off, but the kids shouldn't notice =) 

Then, cut out a bunch of shapes for the eyes, nose, ears, hair, mouth, and miscellaneous (eyebrows, earrings, mustache, etc). I did a half dozen of each body part in various colors. The mix and match is fun. Divide each type of facial feature into different baggies if you want, or just put them all in one big bag and let the kids design away! The results are fun...and sometimes a little creepy...but I love watching my kids be creative!

After they've designed their face, encourage your child to name his or her character, and tell a story about their character.


Browse my other Kid's Craft Projects

Join the Save Money, Live Joyfully Facebook Community

Pin This!


Sunday, March 30, 2014

Art Project-"Stained Glass" Watercolor Collage

This project was kind of our version of an Art Closet Chopped competition. I had scheduled "Art Project" into our school day last week, but somehow forgot to plan exactly what we were going to do. Without time to prepare, I grabbed a few art supplies and improvised. Luckily, Stinker enjoyed it, and it actually turned out pretty cool if I do say so myself. Behold, "Stained Glass" Watercolor Collage.

The best part? Only 4 basic supplies you probably already have at home!
  • 1 sheet white construction paper (I used 11"x 17")
  • 4 white coffee filters
  • watercolor paints
  • glue stick

Rip up the coffee filters and form a collage on the construction paper. This will create the stained glass effect on the your work of art. Attach the coffee filters with a glue stick (regular white glue won't allow for the watercolors to permeate as well, so make sure to use a glue stick.) Then, just have your child take a paintbrush and some watercolors to the collage, and watch it turn into a beautiful stained glass collage!

It's that simple! Enjoy!


You're Invited to Join our Facebook Community
Follow me on Pinterest :)

Monday, December 30, 2013

Top 10 Posts of 2013

For our family, 2013 was definitely better than 2012 (read a little about our 2012 here), but it was far from perfect. We experienced the joy of Junior getting to hear for the first time, but there is still concerns about what his future will hold. I have learned so much this year...namely contentment in the midst of struggle, and practicing faith instead of fear. Here are my top 10 posts from this year...I look forward to sharing more with you in 2014, and have some fun new series planned.

10. Deep Dish Skillet Pizza

9. Saving Money Eating Organic

8. An Update, An Apology, and Encouragement

7. Living Joyfully...Paradise Hidden

6. My Favorite Things at Trader Joes...Snacks and Chips

5. Make it Or Buy it? Jewelry Cleaner


 4. 8 Non-Food Items You Should Buy at Costco

 3. DIY Travel Lap Tray

2. 8 Frugal Things to Do With Eggs
 
1. Junior's Story Part 1, Part 2, Part 3

We'd love for you to join our Facebook Community, and look for us on Pinterest! Thanks for reading, and see you in 2014!

Sunday, April 7, 2013

DIY: Travel Lap Tray

I'm really excited about my DIY project today!

Stinker likes to draw/color/write in the car, but inevitably, it makes a mess and markers go everywhere whenever I make a turn. So I decided to make a contained tray that would allow her to keep all her projects in one place.

I purchased a cookie sheet from the dollar store. I found a notebook on clearance at Michaels, as well as adhesive magnetic strips, and found a small container and mini dry erase board erasers in the Target Dollar Spot. I had washable dry erase markers on hand, but you could use any markers. They don't have to be dry erase. The cookie sheet is a great surface to write on...simply erase with a dry erase eraser or a damp paper towel.

I merely cut the magnetic strips to size and attached them to the notebook and small container, then stuck them to the cookie sheet. That's it! You can also place the magnetic adhesive on other things, such as action figures or blocks*.

*Magnets are a choking hazard. Make sure your child is supervised while playing with anything that has a removable magnet. Ensure the magnet is properly affixed to the toy before giving it to your child. 

Stinker is going to be so excited when I give it to her. She might even bring it everywhere we go, and not just use it in the car!


Price: 
Cookie Sheet....... $1.00
Small Container.....$1.00
Notebook.............$0.50
Dry Erase Erasers.$1.00
Magnetic Strips....$1.79 (though I only used about a third of the bag, I'm including the full price.)
-----------------------------
Total...................$5.29

Come Join our Facebook Community!

Wednesday, April 18, 2012

Kid's Art Project-Fizzy Colors

I saw this idea on Pinterest and knew it would be a great project for my preschooler. All you need is a rimmed baking sheet, baking soda, vinegar, and food coloring. This kept my daughter occupied for an entire hour! 

Fill the rimmed baking sheet with baking soda, (I used a small sheet, and needed about 1 C baking soda to cover it) and fill several small containers with vinegar. Add the desired colors of food coloring to the vinegar. Using a medicine dropper (or a straw, since I have no idea where our medicine dropper disappeared to), drop some colored vinegar onto the baking soda sheet and watch it fizz up!

It was only so long that my daughter wanted to use the measly straw, though, so soon she was dumping it via spoon. It's fine. Vinegar and baking soda doubles as a great all-purpose cleaner :)
We discussed the concept of a chemical reaction, and why the colors fizz when they hit the baking sheet.

I refilled the baking soda sheet three times once it was saturated with vinegar. I could have gotten some chores done, but my daughter was enthralled and kept yelling "Mama, hurry! Come see! This is amazing!"

Check out all our Kid's Art and Learning Projects HERE.

Come be a part of the Save Money, Live Joyfully Facebook Community.

Popular Posts