Showing posts with label Family. Show all posts

Sunday, February 1, 2015

11 Super Awesome Perks of Homeschooling


Follow Me On Facebook, Pinterest, and Twitter


I love homeschooling. I really, really do. We have chosen to homeschool our kids for several compelling reasons, and I'll admit it is a lot of work, but there are also some super secret awesome perks to homeschooling! Here's my list:  

1. No School Traffic. It's a little known fact that each time you get stuck in school traffic it takes approximately 47 seconds off of your life. I'm reducing my stress and my risk for a school traffic induced cardiac event by homeschooling.

2. I Have a Realllllly Good Excuse as to Why My House is Never Clean. (They're always with me...when would I have time to clean!?)

3. We Can Take Vacations in the Middle of the School Year. Since school started in our district last year, we've been to Connecticut, New York, San Francisco, and will soon take a road trip to Zion National Park. Traveling when other kids are in school is a huge benefit, and means cheaper hotel rooms and flights (not going during peak season), and less crowds.

4. We Can Sleep In. Waking Tater up out of a deep sleep is like waking up a hibernating bear. It starts the whole day on the wrong foot. Letting her sleep until she's ready to get up ensures no Tater Bear and we all live in harmony.

5. No Make Up Work. If Tater is sick, we wait until she's healthy enough to do studies. No racing against the clock trying to make up worksheets, and no risk of missing out on something.

6. Feeding My Book Addiction in the Name of Education. When I see a really cool world atlas at Costco, well, I have to buy it. You know, for school. Same thing for craft supplies. I have a craft supply problem. But it's for art class, so it's okay.

7. We Never Get an Email That Says: "The Whole Class Has Lice". My kids have good immune systems and are exposed to plenty of germs from doctor's offices (Junior has SO many appointments), playgrounds, neighbor kids, and sports, but we also have the option to isolate if we need to.

8. I Don't Have to Ask "What Did You Learn Today?" And, if she says "nothing", well, I'm more than happy to add some more work =)

9. We Can Do Schoolwork Outside. Or at the Beach. Or Basically Anywhere. We live in San Diego. If we want to sit outside on Wednesday at 10am and soak up the 74 degree sunshine, we can, and we can still get all our work done.

10. Field Trips. Legoland? Sure, let's talk about engineering. The Zoo? Okay, we'll talk about the habitats of animals. The park for a picnic? Help me measure out ingredients for our pasta salad...water boils at what temperature? Even with all the structured curriculum we use, there's still plenty of time for fun, educational outings. And I don't even need to sign a permission slip.

11. I Get More Time To Spend With My Babies.  As much as they exhaust me, I genuinely enjoy spending time with my kids. They're growing up so fast, and I'm grateful I get to spend my days with them.

Monday, January 12, 2015

8 Things Special Needs Parents Are Tired of Hearing


 *Follow Me On Facebook, Twitter, and Pinterest*

We were at a doctor's appointment today for one of Junior's specialists. While waiting, a little girl about 10 years old, unable to move or speak came in for an appointment being pushed in a wheelchair by her obviously frazzled mother and her care nurse. The other families who were waiting just ignored her, probably because they didn't know what to say or do, but Junior ran up to this little girl, grabbed her arm, touched her face and started babbling to her. The girl smiled and started shaking with delight because someone wanted to play with her. The mom thanked me profusely for letting Junior be around her, because it's obvious that most other people either stare or just ignore her.

I realize that one of the unique challenges of being a special needs parent is that most people don't know what to say or do when presented with a child that's not "typical". It's interesting to hear many of the same things over and over. In speaking with other special needs parents, here are 8 of the hardest things for special needs parents to hear.

1. "I'm Sorry."
Often, when I share that Junior is deaf or that he has sensory processing disorder, people apologize for no reason. Don't apologize. First of all, Junior wouldn't be Junior if he were born any different so I'm not sorry for it, and second, having a disability isn't something to be ashamed of. Being different shouldn't invoke pity. It's like saying "Your daughter has blue eyes. I'm sorry." Or, "Your nose is bigger than mine. I'm sorry." Instead, ask kindly, get informed, and know that his differences don't define him.

2. "God Knew You Were Such a Good Mom That He Gave You a Special Needs Child."
Wait, what? So if I were a worse parent God would have given me a typical child? 
I trust God with my life, and that means accepting that His ways are above my ways, and that He chose this path for me because it was the best path for me. Not because I was "too good" or not good enough.

3. "How Do You Handle It? I Couldn't."
Yes, you could. You would rise to the occasion and realize that you're stronger than you know. You do what you have to do, plain and simple.

4. "I Don't Care, As Long As My Future Children Are Healthy."
I've been there. I've said that more than once while pregnant with both of my children. But guess what? Even if you do have a child born with a disability, you'll still love him or her more than anything, and you'll realize that there are many incredible gifts that a special needs child can give. Eternal gifts like hope, joy, patience, and peace that you wouldn't trade for anything.

5. "My Cousin's Friend's Sister's Son Has ________"
I know you're trying to relate and make conversation, but unless you actually know the person you're referring to, there's nothing to relate to.

6. "What's Wrong With Him?"
Nothing's wrong with him. See #1.

7. "Thanks for the Perspective"
I had someone come up to me and say "I'm so lucky I'm not in your shoes. Thank you for making me feel better about my life." Wow. I'm glad to give you perspective, but please don't pity my life or think I'm somehow missing out on something better.

8. (Staring in Silence)
Okay, this one isn't something that's actually said, but staring or pointing is more hurtful than just coming up and asking. You're not going to offend me by asking about Junior, but you probably will offend me by silently staring, pointing, and talking amongst yourselves.

Contrary to popular belief, "special parents" do not get "special kids". Special kids make special parents. 

Read Junior's Story HERE

Tuesday, December 16, 2014

20 Household Objects for "Inventor" Kids


My 6 year old, Tater, is a natural born inventor. From the infamous "baby slingshot" she invented when Junior was a newborn (a prototype I did not allow her to test out), to the more recent new and improved "up-the-stairs-diaper-lifter" (a good idea, but not a particularly hygienic design), she's always been one to tinker.

Here are 20 household items I always try to have on hand for her when she gets a creative bee in her bonnet and wants to invent something. Putting the little, loose items together in a cute container makes it extra easy for her to grab when she's bored.

You'll be amazed what creative contraptions your child will come up with...the possibilities are endless, even with these common and somewhat random household objects. When your child is done, you can either toss everything or recycle the items for the next creation.

Most of these things can be found at the dollar store, and if packaged right, would make a really cute DIY gift.

*Certain listed items could be a choking hazard and are recommended for children aged 5 and up. Please supervise children at all times.

1. Rubber Bands
-all different sizes and colors 

2. Paper Clips
-the big clippy ones are extra fun

3. Bottle Caps
-save the caps from your water bottles and juice gallons for different sizes

4. String
-a ball of endless wonder!

5. Tape
-what is it with kids and tape?! 

6. Straws
-we love the big smoothie straws, although the flexible ones are useful too

7. Plastic cups
-paper cups work too

8. Paper plates
-extra points for colorful paper plates

9. Wooden Spoons
-get a pack of them at the dollar store

10. Single Hole Punch
-how else is string supposed to fit through a paper plate?

11. Markers
-for decorating the invention

12. Paper 
-for drawing a model/design

13. Wooden Chopsticks
-who knew!?

14. Paper Muffin Liners
-yes, really...

15. Empty Plastic Containers
-wash out those sour cream and yogurt cups

16. Popsicle Sticks (Craft Sticks)
-one of the best "creative" supplies you can get

17. Cotton Balls
-every invention needs a little padding

18. Metal Washers
-these are super inexpensive at hardware stores

19. Plastic Spoons
-one word: catapult

20 Aluminum Foil
-these turn into balls, wrap thing, become a cover...more useful for the kids than for me!


Pin This!


Follow Save Money, Live Joyfully on Facebook, Pinterest, and Twitter!

Tuesday, July 15, 2014

5 Ways to Save Money on a Family Vacation

Family Vacations should be an exciting time filled with wonderful memories and shared experiences. It should be a time of joy, and not worrying about the financial side of things. To get the most out of your vacation, try some of these money saving tips!

1. Set a Budget and Give Yourself Wiggle Room
-The first thing you'll want to do when planning a vacation is to set a budget. This should be a budget for everything, not just the travel and lodging expenses. You'll want to make sure you plan on the cost of meals, gas, and souvenirs. If you max out your budget on the hotel, you'll stress out every time you go to dinner or have to tip someone.

2. Start Planning Early...and Keep Checking
-For our last vacation, I started planning about 4 months before our travel dates. I kept an eye on airfare and hotels for several weeks before booking anything.  I looked for lodging coupon codes on Retailmenot and looked around for seasonal deals. We purchased a travel package when I was convinced the price was at its lowest, about 3 months before our travel dates, but purchased the additional insurance for our trip in case we found a better deal. I'm glad we did! About 6 weeks before our vacation, I repriced the entire package and it was $500 cheaper. So I canceled and rebooked. It was a bit of a hassle, but we saved $500 that would pay for our meals while traveling.

3. Find a Hotel with Free Breakfast and Pack Lunches
-Whenever we travel, we look for hotels that offer complimentary breakfast, then purchase lunch items--such as lunch meat, bread, chips, and water at Costco when we arrive and store them in the room mini fridge. Then we're only paying for one meal every day. The savings really adds up.

4. Look for Local Coupons and Check Online Reviews
-Before you go, check Groupon or Living Social for any local restaurants or activities you can save on. You can also check Yelp or other review sites for out-of-the-way restaurants that may charge less than touristy areas, and local favorite activities that aren't overpriced.

5. Consider Souvenirs Carefully
-Souvenirs can really eat away at the budget. And usually, these little trinkets end up broken or misplaced, being little more than wasted money. One of my favorite souvenirs is to take lots of pictures, then create a photo book when we get home. It's something the kids can look through over and over again, and we can relive the memories without wasting any money.  

Finally, Enjoy Your Family Time, No Matter Where You End Up
-The point of a family vacation is to enjoy the time together no matter what your budget is. By planning ahead and giving yourself wiggle room in your budget, you can enjoy your time without worrying about how much you're spending, since you've already planned on the expense. And when you've removed the stress, you're free to create wonderful, lifelong memories.

What is your favorite way to save on vacation? Let me know in the comments!

Join the Save Money, Live Joyfully Facebook Community or Follow Me on Pinterest

Pin This Post!


Wednesday, June 4, 2014

50 Cheap or Free Summer Activities

I can still remember the excitement of that last day of school...visions of sleeping in, watching TV, and eating tuna fish sandwiches by the pool all danced in my head. Such bliss.

Now, that stuff was fun...for about a week...then the boredom set in. By the time September rolled around, I actually looked forward to the first day of school. So, to avoid the summer boredom, here are 50 of my favorite cheap or free summer activities to keep your family busy!

1. Have a Creature Scavenger Hunt (find a black bug, a green bug, a ladybug, a butterfly, etc.)

2. Attend Library Storytime

3. Find and hike local trails

4. Go for a nature walk in your neighborhood. Glue your findings to a nature scrapbook.

5. Have a water fight.

6. Have a Shape Scavenger Hunt in the house (find a round food, a square toy, a rectangular tool, etc)

7. Bring handmade Thank You notes to your local fire station. (You can also bring store bought goodies, as many fire stations won't accept homemade food.)

8. Set up a water slide with the hose and a toddler slide.

9. Write and put on a family play

10. Explore "Free Museum Days" (In San Diego, they have free museum admission days for local residents every Tuesday.)

11. Plant an herb garden

12. Make a vinegar and baking soda "volcano"

13. Build bridges out of popsicle sticks and glue. Test by putting weight on. Winner gets a small treat.

14. Bake cookies for a neighbor

15. Make homemade French bread (the warm weather of summer helps yeast rise!)

16. Make homemade play-doh

17. Go to the local county fair on "half price" day (if available)

18. Build a "track" with painters tape on the carpet, and have races...either with kids or Hot Wheels!

19. Go to a local aquarium fish store, and look at the different colored fish

20. Visit a local Nursing Home and bring handmade cards saying "Thinking of You". Or, grab a group of friends and go sing for the residents.

21. Build a Lego or block city

22. Find a book of great artists at the library, and paint your own version of their works

23. Get inexpensive PVC pipe from the hardware store and create a water run or marble run with the pipes.

24. Explore local parks and splash pads

25. Walk around the local Farmer's Market

26. Look up local street fairs...they happen frequently on summer weekends.

27. Start crafting handmade Christmas presents

28. Have a picnic at the park, the backyard or the beach

29. Look up local "Concerts at the Park"

30. Draw a city out of sidewalk chalk

31. Go to your local historical society (many towns offer free admission, or suggested donations of $1-2.)

32. Start shopping for Operation Christmas Child boxes by keeping an eye on clearance bins and sales.

33. Have everyone go through the house and collect odds and ends to make an "invention". Give small treats for "most unique", "most useful", etc.

34. Have a neighborhood "Day Camp". Each mom takes the kids for a morning, and shows them a new skill. (One day might be gardening, the next baking, the next painting, etc.)

35. Get out old photo albums and show the kids pictures of when you were their age.

36. Hide pennies around the house or in the sandbox and have a treasure hunt.

37. Ask if a non-local friend or cousin wants to be a pen pal.

38. Make a Rock Turtle

39. Have a Yard Sale

40. Discuss how animals use camouflage, and have each child glue sticks, grass, and leaves to an item, and take turns hiding and finding it.

41. Make homemade Finger Paint

42. "Fizzy Colors"

43. "Secret Code Painting"

44. "Stained Glass Watercolor Collage"

45. Set up an obstacle course in the backyard

46. "Camp" in the backyard or living room

47. Have a Family Movie Night

48. Get your favorite childhood book or movie from the library and read or watch it with the kids.

49. Check local theaters for their $1 Summer Film program

50. Build a fort

What are your Favorite Inexpensive Summer Activities?

Pin This!!


Join our Facebook Community

Saturday, May 17, 2014

My View-The San Diego 2014 Wildfires

The San Diego Fires, May 2014
This last week was crazy. Insane crazy. Like the kind of week where you begin to wonder if there really is something to the "It's a full moon", theory.

Monday, I just couldn't get going. I actually had my husband pick up a pizza on his way home from work, which is very rare for a weekday.

Tuesday, I got a phone call that my mom had been in a car accident, and had been transported via ambulance to the hospital. I dropped everything, and my husband rushed home to take the kids so I could go to the hospital. Thank the Lord, she was later released. Although sore, scraped, and bruised, she was fine. 

Wednesday, the largest of some-10 fires in three days started. I've been in San Diego my entire life, and went through the 2003 Cedar Fire which nearly destroyed my grandparents built-by-hand dream home (their home was the only one standing for miles), cancelled my college classes for a full week, and created the most eerie dark-at-midday smoke haze you can imagine. I still can't smell smoke without being transported to those memories. The Cedar Fire remains the worst fire in California history, having burned over a quarter million acres. I also went through the 2007 Witch Creek Fire, which destroyed hundreds of homes in my childhood neighborhood.

So, naturally, when I heard a fire had started up, my first inclination was "Not again". I drove over to a neighborhood ridge near us to assess the danger and the fire's proximity. The strong Santa Ana winds are highly unpredictable, and since the fires were getting closer, I decided to pack a bag just in case. It was difficult to relax for the rest of the week, as Stinker's sporting events were canceled, roads were closed, and the smell of wildfire lingered day and night.

The fires are still not quite 100% contained, but thanks to the amazing bravery and nonstop work of the firefighters, the threat to local homes has been mostly diffused.

Since Wednesday, dozens of homes have been scorched, and the blackened hillside near our home remains a charcoaled reminder that anything can happen, and to not take for granted even one more day.

So much smoke in the air...my father-in-law captured the photo on the bottom right (used with permission) of a fast moving "fire tornado" caused by high winds.


Pin this Post! 


Join our Facebook Community

Follow me on Pinterest

Monday, March 31, 2014

"Ask Sara":Entertaining on a Budget

"We often host my extended family for dinner, which we really enjoy, but I'm looking for inexpensive meal ideas to feed a crowd."
-Maria

Thanks for your question, Maria! What a wonderful and meaningful tradition to have your family over to spend time together for dinner. Those are memories you will treasure for a lifetime!

I also understand the need to stay within your budget, and especially while entertaining a group of people, expenses can add up quickly!

You can read some of my favorite ways to stretch meat here, but there are many satisfying, healthy, and flavorful meals you can make without spending a ton. Here are some ideas:

1. Make-Your-Own Bars are fun and inexpensive. By shredding meat for tacos or sandwiches, or making your meat stretch in a chili or soup, you can feed a group on the cheap. Put out some toppings, and let everyone get creative.
I recently had a get-together where I made a chili bar. Including all the toppings and the chili, (serving 12), I spent less than $30 total. 
-Chili  -(cheese, corn chips, sour cream, green onions, white onions, hot sauce, cornbread)

-Tacos/Burritos- (Chicken, Pork, or Beef) (cheese, lettuce, sour cream, avocado, salsa, hot sauce, rice, beans)

-Baked Potatoes- (cheese sauce, chili, bacon, green onions, cheese, sour cream)

-BBQ Sandwiches (Chicken, Pork, or Beef)-(coleslaw, mustard, onions, BBQ sauce, mayonnaise, cheese, pickles)

-Pasta-set out different pasta shapes (spaghetti, rotini, farfalle, etc) along with various types of sauce (marinara, alfredo, pesto, etc.) It's fun to mix different sauces together too...Pesto Alfredo is delicious! Set out with cheese and bread. Don't forget my tip on heating pasta in a snap.

-Nachos-(cheese or cheese sauce, jalapenos, sour cream, chili, cilantro, onions, olives, beans (refried or black/pinto), rice, meat such as chicken, beef, or pork)

-Salad-Set out lettuce, several types of dressings, and chopped salad toppers (carrots, celery, hard boiled eggs, strawberries, bacon, avocado, olives, bell peppers, cheese, croutons, mushrooms, shredded chicken, pickles, red onion) Since all the ingredients are chopped and stretch pretty far, you get a lot of bang for your buck.
 
2. Casseroles
Making up a simple lasagna (while cheese can be expensive, you can get a lot of servings out of one dish), or Tex-Mex Casserole can save you time and money in feeding a crowd.

3. Soups and Stews
You can stretch soups and stews to feed every last person in your family. Try something hearty like a beef stew or a ham and split pea soup. $10 worth of meat can feed 12 people. Serve with biscuits or rolls.

4. Potluck 
Another option would be to turn the extended family get-togethers into potlucks. People enjoy contributing food, and this could also mean more time enjoying your family, and less time cooking! If you aren't quite ready to make it a total potluck, provide the main dish and have your guests provide the sides or toppings.

Have a question you want to ask me? Submit it HERE!  
Your privacy is important to me...I won't share any information other than your question and first name. (I can even use an alias if you specify.)

Join Our Facebook Community

Follow me on Pinterest

Browse all my Family Favorite Recipes here

Saturday, August 3, 2013

Living Joyfully...Paradise Hidden


Last month, our family had the opportunity to take a vacation…our first such trip in six years. In that span, my husband had not taken more than two consecutive work days off, so it was a much needed break. While there, one of the waiters at a restaurant we ate at asked what sites we had seen. We listed off several spots we had visited, and asked him what else we should see during our trip.


“I’ve lived here my whole life,” he responded, “and you’ve probably seen more in your week here than I ever have.”


I was shocked that he had never taken advantage of his life in paradise, but then realized how true this is for all of us. When entrenched in the routines of life and work and school, we become so focused on getting things done, that we begin to forget the beauty that is all around us. I’m not just talking about tourist sites and nature either, although when was the last time you really took the opportunity to soak in the beauty of a sunset? When we’re focused on the tasks of life, we tend to forget the beauty of our family, of a roof over our heads, of food on the table. The beauty of the blessings we take for granted.


This week, try to look at life with new eyes. New eyes that see the beauty around you. When you walk outside to check the mail, listen to the birds. Next time you notice the sun setting, take a few minutes to let the peacefulness overwhelm your heart. Say “thank you” more often, and find something to marvel at. You might be surprised at how much paradise you can find hidden inside the nooks and crannies of a normally tedious routine


Wednesday, July 31, 2013

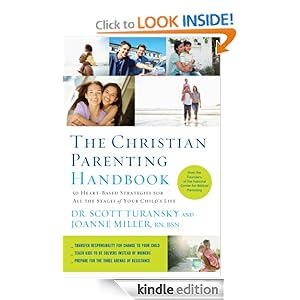
Book Review: "The Christian Parenting Handbook"


Ever since Junior was born last year, Stinker has had a bad attitude. I understand it…she went from being the center of our attention, to being dragged along to doctor’s and therapy appointments multiple times a week, and watching as Junior’s special needs took up the majority of our time. We didn’t really have a choice, but, as her mom, it’s hard for me to feel like I’m not giving her the attention she needs.

I was so blessed to read “The Christian Parenting Handbook: 50 Heart Based Strategies for All the Stages of Your Child’s Life” while Stinker was going through one of her more difficult stages. This book, written by Dr. Scott Turansky and Joanne Miller, is comprised of 50 short chapters, each one delving into a possible issue with a child’s behavior, and heart-based strategies on improving the behavior.

I like heart-based parenting approaches, because it teaches children that being well-behaved is a deeper issue than listening to a parent “because I said so”, with a punishment being the feared consequence. A heart-based approach works on a child’s character, strengthening them as people and teaching them to respect, honor and obey because it’s the right thing to do, not because it helps them avoid trouble.
This book is very easy to read, and has a lot of good insights. I have used several of the strategies with success in attempting to turn Stinker’s attitude around. This book encouraged me to give her grace, and treat her offenses as learning opportunities instead of inconveniences or frustrations, with the end goal of making her a respectful, godly young woman, and not a little robot who listens to everything anyone tells her to do.

I recommend this book to any parent who is looking for a little inspiration in parenting, or who is looking for solutions to their child’s behavioral or attitude issues.

Thanks to the publisher and Booksneeze for providing a copy of this book for review. All opinions are my own and have not been influenced in any way.

Sunday, April 7, 2013

DIY: Travel Lap Tray

I'm really excited about my DIY project today!

Stinker likes to draw/color/write in the car, but inevitably, it makes a mess and markers go everywhere whenever I make a turn. So I decided to make a contained tray that would allow her to keep all her projects in one place.

I purchased a cookie sheet from the dollar store. I found a notebook on clearance at Michaels, as well as adhesive magnetic strips, and found a small container and mini dry erase board erasers in the Target Dollar Spot. I had washable dry erase markers on hand, but you could use any markers. They don't have to be dry erase. The cookie sheet is a great surface to write on...simply erase with a dry erase eraser or a damp paper towel.

I merely cut the magnetic strips to size and attached them to the notebook and small container, then stuck them to the cookie sheet. That's it! You can also place the magnetic adhesive on other things, such as action figures or blocks*.

*Magnets are a choking hazard. Make sure your child is supervised while playing with anything that has a removable magnet. Ensure the magnet is properly affixed to the toy before giving it to your child. 

Stinker is going to be so excited when I give it to her. She might even bring it everywhere we go, and not just use it in the car!


Price: 
Cookie Sheet....... $1.00
Small Container.....$1.00
Notebook.............$0.50
Dry Erase Erasers.$1.00
Magnetic Strips....$1.79 (though I only used about a third of the bag, I'm including the full price.)
-----------------------------
Total...................$5.29

Come Join our Facebook Community!

Thursday, March 21, 2013

Junior's Story...Part I

My then-3 year old daughter, painted this picture of our soon-to-be-completed family several weeks before our son was born. We had a beautiful daughter, and were expecting a precious little boy. Life was good. We could not wait to welcome our son, and counted down the days to when he would make his grand appearance. Little did we know that his arrival would flip our lives upside down.

The Pregnancy 
I found out I was pregnant on a Sunday in September. While a planned pregnancy, I cried when I found out, only because I knew what I was going to expect. Among other issues, I had severe morning sickness all 40 weeks with my daughter (well, 39, as she decided to vacate a week early, probably out of pity for me.) Imagine the worst food poisoning you've ever had...then imagine suffering through it for 24 hours a day for 8 and a half months. I still shudder to think about it. Sure enough, about 5 weeks into my pregnancy, the morning sickness started. It was intense and unwavering, but not nearly as bad as with my daughter when I had lost 15 pounds, so I knew it was going to be a boy. 

While praying for my children one night, God placed on my heart that this baby was going to be a "healer." I didn't know what that meant, but kept it in my heart. 

At 11 weeks pregnant I started spotting, and was put on bedrest. The first week wasn't so bad...no cleaning, (vacuuming was especially prohibited), and people bringing meals...but then the weeks turned into months. I had an active and energetic 3 year old at home who couldn't understand why Mommy couldn't play with her. Frustration began to set in.

Soon after Christmas we confirmed our baby was indeed a boy. Three days later, my mother-in-law passed away suddenly and unexpectedly. We were all grief-stricken, but the words "this baby will be a healer" popped into my head. Perhaps this boy was going to heal our family from our great loss. 

Junior's Arrival
We worked through the next few months, until finally, I went into labor. (After 24 weeks of bedrest, I was off for one measly week, then put back on for high blood pressure until delivery, so it couldn't have come soon enough!) After 5 hours of labor and three pushes, Junior was finally here. He was beautiful. Perfect. Precious. 

That night, the nurses came in to perform a few routine tests. I was not prepared for the results, and suddenly our entire world changed...

Be Sure to Read the Second Part of Junior's Story Here...

Popular Posts