Showing posts with label Travel. Show all posts

Sunday, February 1, 2015

11 Super Awesome Perks of Homeschooling


Follow Me On Facebook, Pinterest, and Twitter


I love homeschooling. I really, really do. We have chosen to homeschool our kids for several compelling reasons, and I'll admit it is a lot of work, but there are also some super secret awesome perks to homeschooling! Here's my list:  

1. No School Traffic. It's a little known fact that each time you get stuck in school traffic it takes approximately 47 seconds off of your life. I'm reducing my stress and my risk for a school traffic induced cardiac event by homeschooling.

2. I Have a Realllllly Good Excuse as to Why My House is Never Clean. (They're always with me...when would I have time to clean!?)

3. We Can Take Vacations in the Middle of the School Year. Since school started in our district last year, we've been to Connecticut, New York, San Francisco, and will soon take a road trip to Zion National Park. Traveling when other kids are in school is a huge benefit, and means cheaper hotel rooms and flights (not going during peak season), and less crowds.

4. We Can Sleep In. Waking Tater up out of a deep sleep is like waking up a hibernating bear. It starts the whole day on the wrong foot. Letting her sleep until she's ready to get up ensures no Tater Bear and we all live in harmony.

5. No Make Up Work. If Tater is sick, we wait until she's healthy enough to do studies. No racing against the clock trying to make up worksheets, and no risk of missing out on something.

6. Feeding My Book Addiction in the Name of Education. When I see a really cool world atlas at Costco, well, I have to buy it. You know, for school. Same thing for craft supplies. I have a craft supply problem. But it's for art class, so it's okay.

7. We Never Get an Email That Says: "The Whole Class Has Lice". My kids have good immune systems and are exposed to plenty of germs from doctor's offices (Junior has SO many appointments), playgrounds, neighbor kids, and sports, but we also have the option to isolate if we need to.

8. I Don't Have to Ask "What Did You Learn Today?" And, if she says "nothing", well, I'm more than happy to add some more work =)

9. We Can Do Schoolwork Outside. Or at the Beach. Or Basically Anywhere. We live in San Diego. If we want to sit outside on Wednesday at 10am and soak up the 74 degree sunshine, we can, and we can still get all our work done.

10. Field Trips. Legoland? Sure, let's talk about engineering. The Zoo? Okay, we'll talk about the habitats of animals. The park for a picnic? Help me measure out ingredients for our pasta salad...water boils at what temperature? Even with all the structured curriculum we use, there's still plenty of time for fun, educational outings. And I don't even need to sign a permission slip.

11. I Get More Time To Spend With My Babies.  As much as they exhaust me, I genuinely enjoy spending time with my kids. They're growing up so fast, and I'm grateful I get to spend my days with them.

Saturday, January 24, 2015

DIY Pattern Block Velcro Board

*Follow Me on Facebook, Pinterest, and Twitter*


So, it's no secret that I'm in love with dollar store cookie sheets. You can make all sorts of cool things, like this project, and this one (one of my most popular posts ever), and they're only a dollar meaning you can buy 2 or 4 or 17. They're also magnetic, which is great fun. (It's no surprise that magnets are one of my favorite things in the world, seeing as how Junior has one implanted in his head.)

Like magnets, Velcro is just fun. It makes things stick without making them sticky. I have issues with sticky things. Ick.

My kids love playing with blocks and making designs, and I knew there had to be a way to make blocks portable. We're in the car a lot, and Junior's been watching way too much Curious George on the DVD player. In an effort to get the theme song out of my head, and to keep him more actively engaged during car rides, I decided to take on the challenge of making blocks portable.

I ordered 15 feet of Velcro Stripsfrom Amazon (affiliate link), and also purchased some Velcro dots from an office supply store. I ended up using both the dots and strips...more on that below, but you really only need the strips.

Supplies:
We had a set of wooden pattern blocks from our math curriculum that I used to make this tray. We had 250 blocks in the set, and I probably only used 40 for this project, so we still have plenty left over for math.


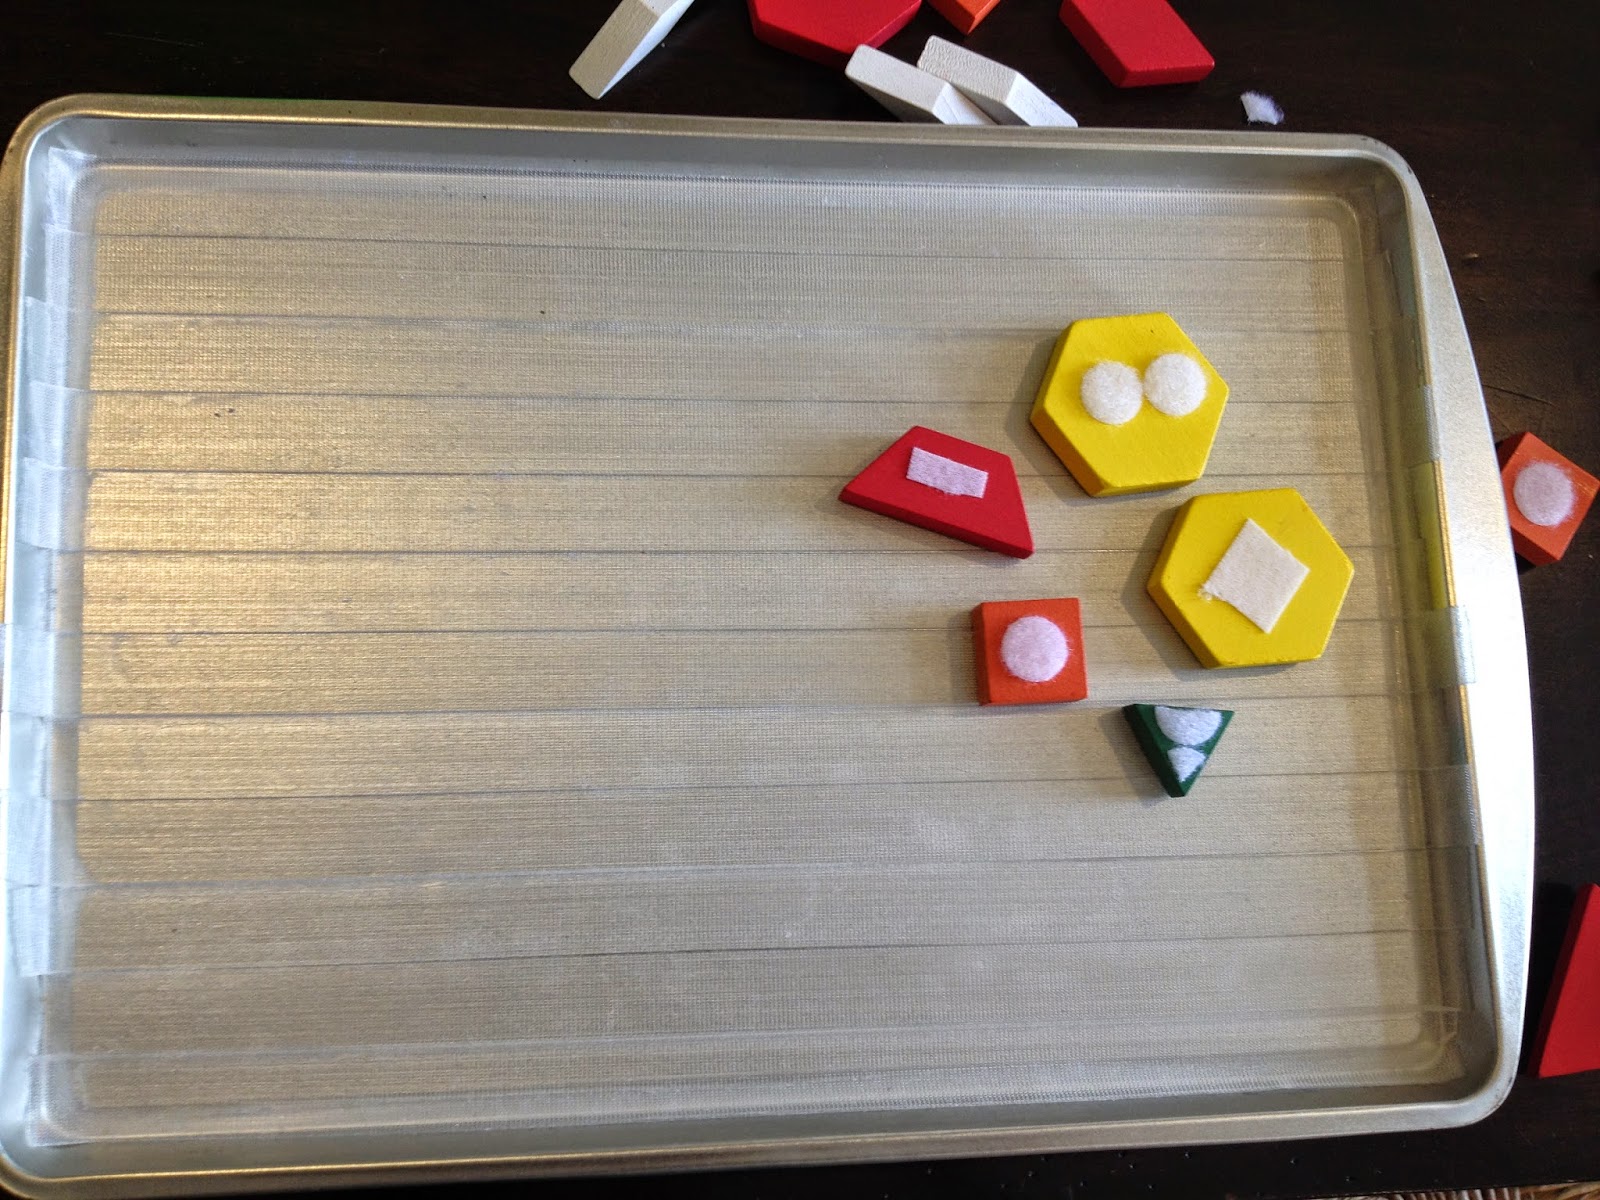
First, measure out the length of the cookie sheet, and cut Velcro strips (you can use either side of the Velcro, but I did the pokier side for the board and the softer side for the blocks) to that length. Carefully attach the Velcro to the cookie sheet in one layer, making sure not to overlap the strips.

Once you've covered the cookie sheet with Velcro, get out the blocks you want to use. I used a variety of all the shapes. Probably about 40 in all. Take the opposite texture from the Velcro you used on the board (if you used the spikier side on the board, use the soft side for the blocks. If you used the soft side on the board, use the spikier side for the blocks.)

I used the strips on the board, and started using the dots on the blocks. But, I found they didn't stick as well, so I finished up using a little of the strips for each block. The strips seemed to stick better, but the Velcro itself didn't stick to the blocks as well because I had to pull so hard to get the blocks off. Tater said she preferred the dots better because they were easier to use. It's your preference.


Once the Velcro is attached to the blocks, you're done! Store the blocks in a plastic bag, and make sure to keep the board clean, otherwise it won't stick as effectively.

I'm excited to add this to my Road Trip Must Haves for our next trip!

I'm linking up at Tater Tots and Jello and Flamingo Toes

Thursday, November 13, 2014

Junior's Update-November 2014

The longer we have been on this special needs journey, the more "normal" it has become. Letting Junior be Junior means I don't notice his limitations first; I notice him first. That said, it's still exciting to hear him say a new word, reach a milestone, or make progress.

Last week we took a long weekend road trip to the Bay Area. The kids did surprisingly well on the 8- hour-each-way drive, thanks mostly to DIY Travel Games and the DVD Player. Junior had a couple of meltdowns, but overall he did well considering he didn't nap in the car at all.

I celebrated my 30th birthday up there, and Junior even tried to sing me "Happy Birthday"! It came out "Hap uh buh", but at least he tried!

Junior loves fish, so we took the kids to the Monterey Bay Aquarium. Junior ran around with boundless energy, running from one exhibit to another, but occasionally would stop to see a creature up close. He picked out an octopus hat as his souvenir, and spent the trip home saying "hah", for hat. He loves to wear it!

Junior is going to be 2 and a half this month, and has been hearing for 20 months. His language should be that of a 20-month old, but he's above in some areas and below in others. His receptive language (what he understands), is excellent. He understands several hundred words and phrases. His expressive language (what he can say) is behind a bit, but he says roughly 80 words. A stranger wouldn't be able to understand much of what he says, but we are confident that his annunciation will dramatically improve as he gets older.

Junior has also shown interest in letters and numbers recently. I started showing him letter and number DVDs in the car and working with him when we get the chance, and he can recognize and say all his letters, and can count to 10. I'm so impressed with his willingness to learn, but also understand that his inability to communicate at age level must be very frustrating for him.

Which has been the reason we're doing Occupational Therapy (OT). He gets very frustrated very easily, and takes it out in ways he shouldn't. (Throwing, hitting, tantrums, etc.) The hope for OT is to give him coping skills, and to make his body and brain work together more efficiently. He's also a very poor sleeper, so we're hoping that OT improves that area of his life (and ours!) as well.

The next step in his speech progress is going to be 2-3 word phrases. He has recently begun using several 2 word phrases "more ____", "want _____", "hi _____", and the new words he's saying include hat, play, phone, pizza, hungry, and stop.

I can't believe how quickly the rest of this year has been flying by. I'm sure his next words will be "turkey" and "buffet"!

Read Junior's Story HERE

Connect with me on Twitter and Facebook. Follow me on Pinterest!


Saturday, November 8, 2014

5 DIY Travel Must Haves for Kids

For my 30th Birthday last week, we took a long weekend family road trip up to Northern California, to the town where my husband and I first lived after we got married. We wanted to take the kids to some of our favorite places up there. The drive was 8 hours each way, and while we did utilize the DVD player at times during the trip (Junior has been in a screaming phase lately, so the DVD was for my sanity and survival), I also brought along a lot of fun activities to keep the kids occupied. 

Travel Lap Tray

This is so easy and inexpensive. It makes for a great all-purpose travel tray. Definitely my top must-have for any road trip or plane ride. See the instructions here.


 Lego Patterns Travel Game (Free Printable)

My 6 year old has a lot of fun with this Lego pattern game, and it's easy to transport. Make sure you pack a few extra pieces in case they're dropped! Get the printable here.


 DIY Lego Travel Tray
We've brought this super easy Lego tray on every trip we've taken in the last year, and I can guarantee at least 45 minutes of quiet when my daughter is building. Find the simple instructions here.


 Felt Funny Faces
For some creative fun, follow this tutorial for making a Felt Funny Face kit. Working on their Travel Tray, let your child mix and match facial features to create their own funny faces. 


Imagination Connect the Dots
Purchase a sketch pad from the dollar store, and draw a bunch of dots on each page. Have your child connect the dots however they want, and have them tell you the story behind their "drawing". See some examples here.


What are your must-have travel activities? Join the conversation on Twitter and Facebook!

Pin This!


Wednesday, June 25, 2014

DIY Lego Travel Tray

Last summer's travel lap tray idea worked relatively well on our travels, but now that Stinker is really into Legos, and after I made the Lego Pattern Travel Game last week, I began to wonder if I could travel with Legos without worrying about them getting lost or thrown all over the place. Ah ha! It can be done!! A Lego Travel Tray. It takes 2 minutes to make, and only cost about $10. Now, Stinker can build some masterpieces on our next road trip or plane ride, and I won't have to wedge myself under the back seat searching for missing Lego pieces. Not that I've ever done that before. Especially not Wild Style's hair piece. Ahem.

Anyway, the shopping list is pretty straight-forward. You'll need:
  • Cookie Sheet (I get mine at the Dollar Store. They cost $1, and are about 9"x12".)
  • Lego Plate (This was the most expensive piece. I found one for $5.99, and it's a 10"x10".)
  • Magnetic Spice Containers (Michaels had these for $1.50 each, but I had a 15% off coupon)
  • Box Cutter (not pictured)
  • Super Glue or Hot Glue Gun (Not Pictured)
1. First, if you have a 9"x12" cookie sheet, you'll need to cut the Lego plate to fit the cookie sheet. Using a box cutter, apply firm pressure in a straight line, to cut off about 3 rows of raised dots. I actually cut off four, but start with three. Note: You'll want to run the box cutter through two or three times. The plastic will actually break off where the cut was, creating a nice, even cut. My amazing grampa did the cutting for me. Because he's handy like that. And because I can't cut a straight line to save my life.


2. Next, use Super Glue or a hot glue gun to attach the Lego plate to the edge of the cookie sheet. You'll want to leave room for the magnetic containers on the side. Allow to dry.


3. Fill magnetic containers with Legos, and place on the edge of the tray. Apparently I turned my tray between pictures. It was a Monday night after a very long Monday. I have no explanation.

4. Now you can enjoy Legos while traveling, and not have to wonder how Wild Style's hair piece could have possibly jumped out of the car because you scoured every square inch of the backseat and found nothing save french fries that may be older than your youngest child. Again, not that I've ever done that, but just a helpful reminder. Because I care. 

Join our Facebook Community

Pin this!! 


Friday, June 20, 2014

Lego Patterns Travel Game--Free Printables

I've seen a bunch of these ideas floating around Pinterest lately, and figured it would be fun to make my own. Nearly-six-year-old Stinker loves building Legos, and my father-in-law made the kids an awesome Lego table for Christmas last year, so she's always working on something.

We're going to be traveling quite a bit this summer...a much needed family vacation followed by a wedding across the country. So, I wanted a few fun activities for the plane and car. This fun activity requires only 18 Lego bricks, and I have 10 free printable designs to keep your child occupied. Just show them the card, and have them use the bricks (list below on what you'll need) to match their design to the design on the card.

You'll Need These Bricks:
  • Orange: (1) 4x2, (1) 2x2
  • Dark Green (2) 4x2, (2) 2x2
  • Lime Green (1) 2x2
  • Dark Blue (1) 4x2, (1) 3x2, (1) 2x2
  • Red (1) 4x2, (2) 2x2
  • Yellow (3) 2x2
  • White (1) 2x2
  • Black (1) 2x2
Click each Photo Below, Right Click to "View Image", then Print each photo (there are 3). Laminate and cut out the squares and store them with your Lego bricks. 
 

Join Our Facebook Community

Pin This!!


Linked Up At: Not Just a Housewife

Popular Posts